Showing posts with label Painting. Show all posts

Sunday, 18 November 2012

Birds on a Wire on Canvas with String Art

Hi Everyone! Happy Sunday :P. This weekend went by so fast because it was jammed pack of being with family, putting up Christmas lights, and babysitting. I did sneak in some time to do a new craft project that I am very excited to share with you!!!!! This is my variation of Birds on a Wire, with a splash of string art for texture. Below is the finished product and below it is the tutorial on how to make it.

Birds on a Wire - Canvas and String Art
Completed Birds on a Wire - Canvas

Supplies you will need:
  1. A Canvas - the one I used is 15 inches tall, 30 inches wide, and 1.5 inches thick, I got it from Michaels and it was on sale half off for $15.00.
  2. Acrylic Paint - variety of colours
  3. Brushes, sponges, etc.
  4. Nails  - the ones I used were 3/4" and they are from Wal-mart.
  5. Embroidery Thread - I just used plain ol' black embroidery thread. On this project I used almost four 10 yd bundles.
  6. A piece of wood to fit the back of the canvas
  7. Long Screw or Nails - you will see why in a bit.
 
 First I painted the canvas a light blue using a foam brush. It took 3 coats to cover it completely.

I then mixed a blue-green and used a brush to paint around the outside of the canvas. As you can see the colour isn't a huge difference, but this will be base of the shadowed area.

I took a orange paint and used my fingers to place it randomly around the edges of the canvas. I then used water and a brush to blend the orange into the blue-green.

Afterwards I took a dark yellow and did the same as I did with the orange. I then let all the colours dry before I proceeded to the next step. 

I then mixed a light purple and brushed it onto the very outside of the canvas, I then soften the edges of the light purple with a wet foam brush.

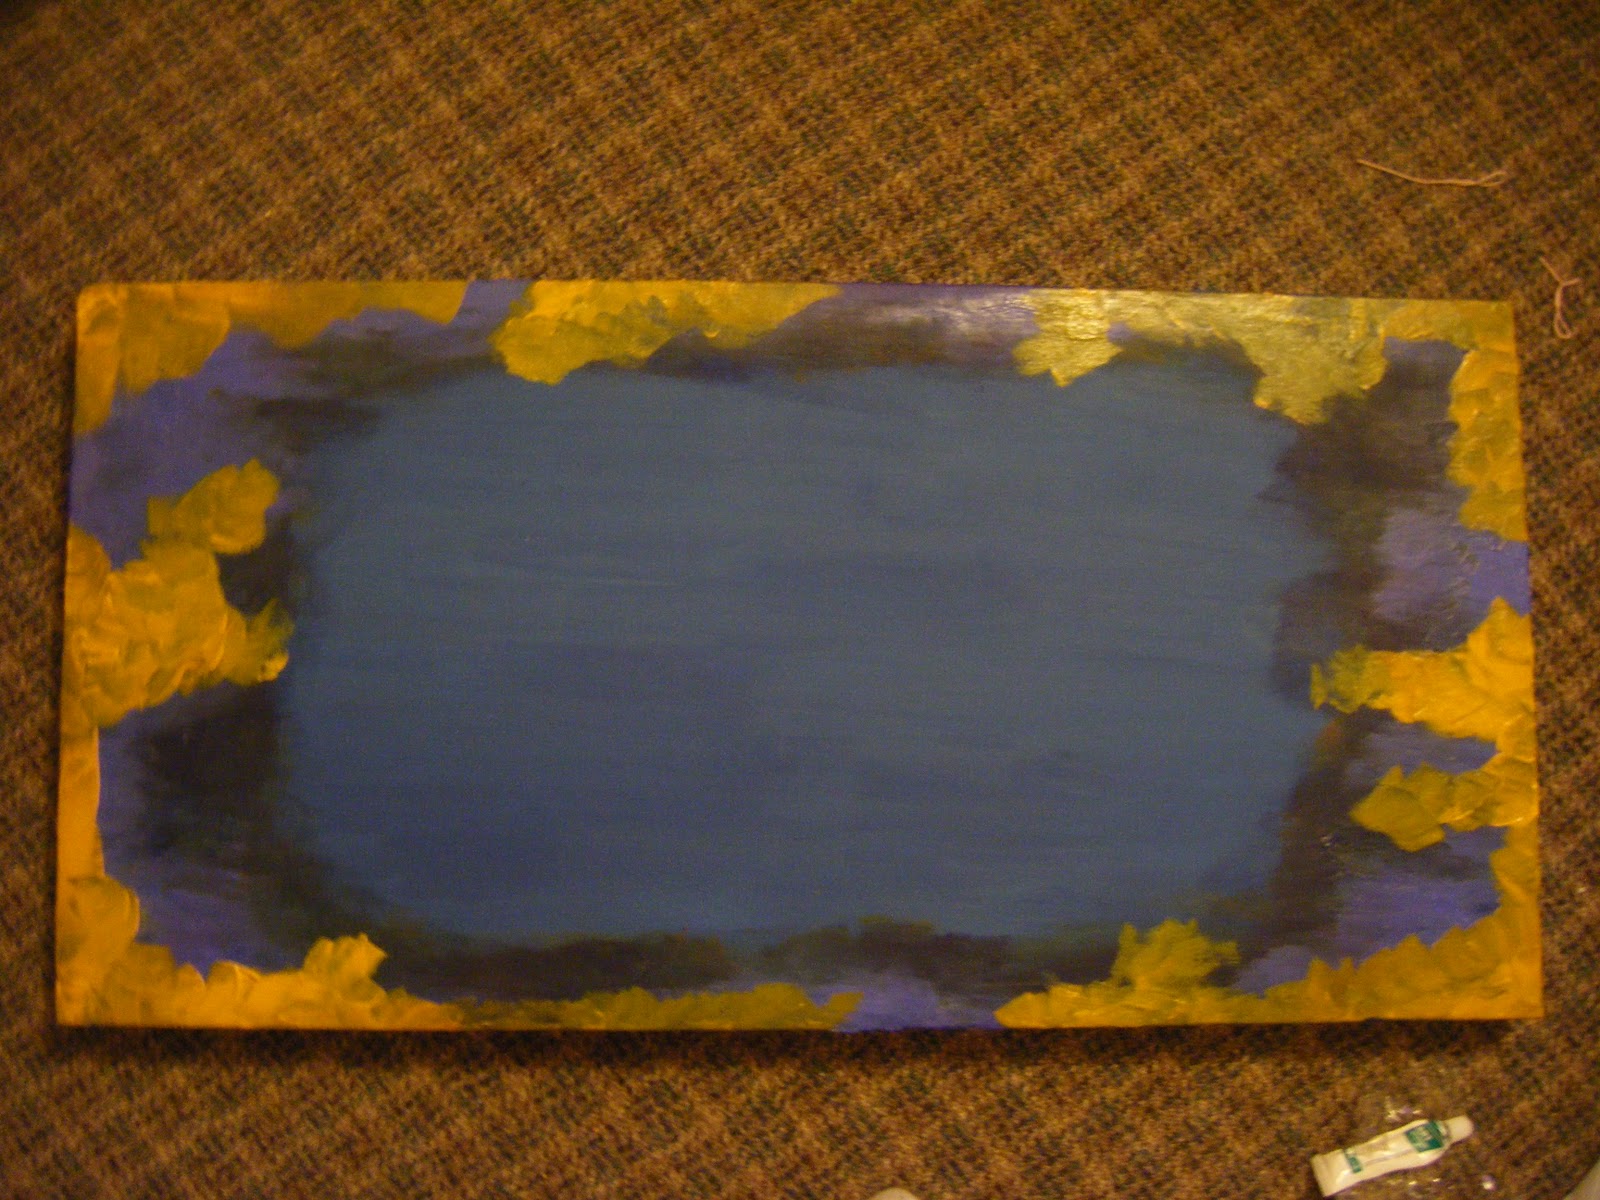
While the purple was still wet, I added the same yellow I used before around the edge of the canvas. The whole point of all these colours is to create depth around the canvas.

Before blending the yellow I placed a small amount of orange around the yellow, this was the same orange I used before. I then used a wet brush to blend the colours together.

Lastly, I blobbed a dark purple around the very edges and blended them into the other colours.


 Here are some pictures of the painting when it was completed and dry.

 To get the nails to stay in the canvas I had to give them something to dig their teeth into, so I placed a piece of wood on the back of the canvas. Unfortunately, the piece of wood wasn't big enough, so I had to get Ricky to cut it and he stapled it to the area where I would be nailing. I then used long screws and placed them in the middle to ensure that the wood stayed sturdy.

I then went on the internet and printed off some birds; they were from an advertisement for a vinyl wall decal. I then cut the birds out and cut out some straight lines and taped it to the canvas.

  
I then nailed all along the outside of the cut outs. If you want more information about this part, please see my first String Art tutorial here http://craftsandnails.blogspot.ca/2012/11/string-art-tutorial.html.

Then I removed the cut-out from the canvas. 

Once the cut outs are removed it will look something like this.


I tied my thread to one of the end nails.

  
Then I started weaving my thread along the nails.

Birds on a Wire Painting with String Art
    
VOILA! All done! This was a great project and I am so excited about how it looks above my TV. I was getting so tired of the big blank space. P.S. Guess what I was watching when I was crafting away? ;)

I hope you enjoyed my tutorial and that you give the project a try!

Thank-you for reading!

- Kristen

Tuesday, 6 November 2012

Button Tree

Don't worry I haven't forgotten about the crafts portion of my blog. I haven't been up to anything new right this minute (I have been busy setting up the Christmas tree and decorations), but I do have pictures of a painting that I did a month ago. I spend a lot of time on Pinterest and find most of my inspiration from there. The inspiration for the painting below was from this site http://fineartamerica.com/featured/1-button-tree-0004-monica-furlow.html. I love the idea of incorporating buttons in crafts and art.

Anyways, the first thing I did was create the background by putting dabs of different colours of acrylic paint and then blending them together with a paint brush moistened in water. I use water a lot when I'm painting with acrylic because it makes it easier to manipulate the paint, as well as you get more coverage with the paint which saves money. After the background was dry I used a pencil to draw out the tree. The next step took the longest amount of time (hours and hours and hours and hours, etc.), and that was all the dots of colours that make the leaves part of the tree. As you can see in the first two pictures below there is a mixture of large dots on the outside and small dots on the inside of the tree. The buttons I bought for the tree were all different colours so I wanted to ensure that the dots were also many different colours; I'm pretty sure I used almost all the colours I had in my paint set for this painting. Anyways, for the large circles I figured I would put my nail polish to and alternate use and used the the top of the brush part. The good thing about this was because it is made from hard plastic it was easy to dip it in the paint and dot it on the canvas. For the little dots I used the end of a pencil crayon.  After all the dots were completed and dry I painted the trunk and branches portion in black. Then came the fun part........................Gluing on all those wonderful buttons! Well I first placed them before gluing them to make sure I liked the placement. But after that I used a glue gun to glue on the buttons, but realized after many burns and having to pick off glue strings over and over and over again, that it was a bad decision. Next time I would use a different type of adhesive that wasn't such a pain in the butt (and my fingers).

I bought the canvases and buttons from Michaels. The Canvases were on sale for 50% off so they only cost me $25 for 4, the buttons came in a tub (a Tub O' Buttons) and I forget how much they cost.

Button Tree Before the Buttons
Button Tree before the buttons were glued on


Button Tree
Button tree after the buttons were glued on
Button Tree Close-up


Thank-you for reading!

- Kristen
http://craftsandnails.blogspot.com