Supplies you will need:
- Table Salt
- Flour
- Warm Water
- Cookie Cutters or something else to make the desired shape you want to make
- Something to make a hole for your ribbon (straw, skewer, anything really)
- Stamps (if you want to do the stamped ornaments)
- Stamp Ink (If you want to do the stamped ornaments)
- Acrylic paint and brushes
- Ribbon
Step 1: Make the Dough
The recipe I used was 2 cups of flour, 1 cup of table salt, and 1 cup or warm water. I then mixed all the ingredients together by hand. I noticed that the dough was pretty flaky and the dry ingredients didn't mix fully with the water, so I added more water until I had a dough consistency. I think my mixing by hand was one of the reasons why my dough cracked. I suggest using a mixer if you have it to ensure all the ingredients are well blended. If you stop to get your cookie cutters, get distracted with something else, or stop to eat a Big Mac in my case, and you return and your dough is a little dry just add a tiny bit of water to it gradually. I then rolled out the dough using a glass because I don't own a rolling pin (starting to see a trend here in my lack of kitchen utensils?)
Step 2: Cutting out shapes
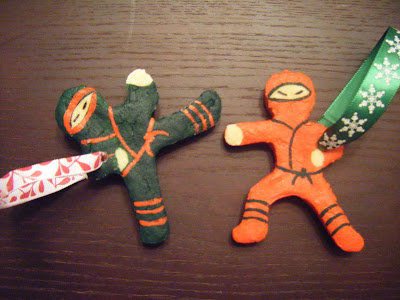
I saw this stamping technique on http://www.oleanderandpalm.com/2011/12/diy-christmas-ornaments-salt-dough.html, and loved the nice modern clean look of the stamped ornaments, so I decided to give it a try. As you can see from the dough I took a holiday joy and bird stamp and stamped the dough with green and red ink. I then cut out the ornaments with a glass or cookie cutter. I also had awesome ninja cookie cutters (courtesy of Caitlin) and some Christmas cutters that I used to cut the dough. Ricky and I don't really have a theme on our Christmas tree, it is more a mish mash of ornaments based on memories and randomness. I used a straw to make the holes where my ribbon would eventually go.
Step 3: Bake em'
I put them on a very old toaster oven tray with aluminum foil underneath them and popped them in my preheated toaster oven (275 F). I waited approximately 2.5 hours for them to be done. I then took them out and let them cool for 24 hours, not for any specific reason except it was too late to decorate them last night. I did talk to my mom late last night (after I discovered that some of my ornaments were poopy looking) and she said that you can put a glass (oven safe) of water in the oven when baking them and it prevents cracking and lumping. Also, I think I cooked them on too high of a temp so they baked faster than they should have.
 |
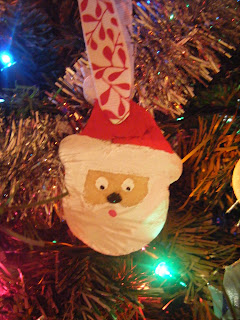
| Present and Santa Salt Dough Christmas Ornaments |
 |
| Ninja Salt Dough Christmas Ornament |
Step 4: Decorate Them
So the stamped ones didn't turn out at all they were all warped and cracked and didn't look all nice and modern like the ones in the other blog :(.....so I decided to use them as mini hockey pucks. I posted a pic of my failure at the end of this tutorial. It was not all lost hope because the other shapes made it through okay, a little lumpy but still good. I decided to paint them to make them pretty, I used acrylic paint. For the little green present, I made the bow and hot glued the ribbon to the present, as for the little stars....well they are actually nail decals and I nail glued them onto the ornament. I got the ribbon at Michaels for $2.00 each.
 |
| Green Salt Dough Ninja |
 |
| Red Salt Dough Ninja |
 |
| Salt Dough Present |
 |
| Salt Dough Santa |
Step 6: Hang them on your tree!!
Step 7: Admit your failures
My poor poor stamped ornaments......... maybe i'll try again in November 2013.
Thank-you for reading!


louis vuitton outlet online
ReplyDeletetommy hilfiger outlet
canada goose outlet
abercrombie and fitch
tiffany and co jewelry
uggs sale
ray ban sunglasses
christian louboutin uk
bengals jerseys
mont blanc mountain pen
chenyingying20161222
nike air max
ReplyDeletekd 11
air max 97
christian louboutin outlet
golden goose sneakers
ferragamo belt
nike air max
moncler
vans shoes
yeezy shoes
a2m90e9g89 s4v74m6n81 g3w37j2a70 p1s92z8p09 j9r58u9b15 e4y72b4z35
ReplyDelete